Treatment/Blocking Sheet

Screen Shot 2018-03-13 at 09.54.43

The character is Me and the obstacle course is a really weirdly laid out the street. I’m running down it because I am being chased by a monster that will take my soul if it catches me. Overall I’m planning for the animation to last at least one minute.I hope for the animation to be as realistic as possible but I will need to learn how to use the Rig tool more as at the moment I don’t really know how to use it.


Final 3D Animation


My Final Animation is not the best as  I didn’t understand how the rig worked. Also, I found that the controls of Maya were hard to remember and I constantly kept using the wrong shortcut. However, I am semi-pleased with that fact that I was able to make my character ‘walk’ across the screen. I think the animation was good however it could be improved by the way it was overall animated. I feel I rushed to create it and it ended up looking not human-like and missed out some key things while animating. To improve this I could learn how to use Maya and create a proper animation using the correct tools.  I found the Rig tool like HumanIk hard to use.

Topology And 3D Pipeline

b47b081d0cc58e7f2a5fbe9199649a17

A topology is the study of geometrical properties and spatial relations unaffected by the continuous change of shape or size of figures.

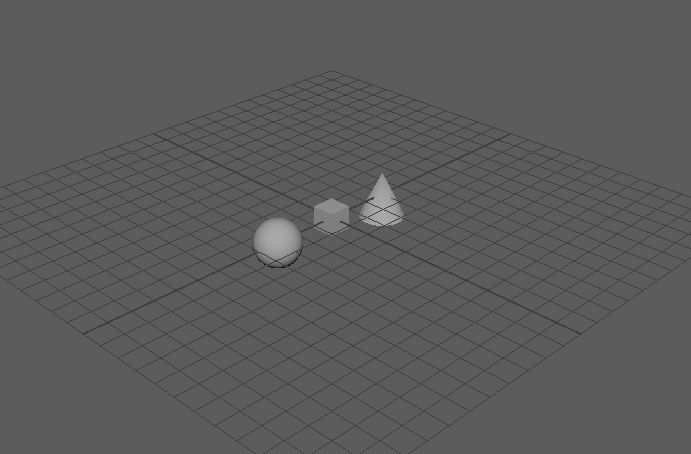
Polygonal: Digital 3D Shapes made up of Faces, created using vertices

NURBS: Non-Uniform Rational Bee Splines

Vertex: Corners of a 3D Shape

Extrusion: Extending a shape to get a new shape

Sub-Division: Dividing a shape to gain more information about a shape

Valence: Number of edges on a shape

N-Gon: A shape with 5 points or more, making the shape uneven and hard to work with.

Cartesian: Maya’s Grid System.

Entertainment

One of the places you can use 3D modelling is in the entertainment field. There’s not a big film that comes out of Hollywood without extensive use of 3D modelling. It’s clearly useful in special effects, not only creating environments that never existed before and supernatural occurrences that unfold quite naturally, but it’s not uncommon to have shots, where things are added that you might not even realize, are artificial. 3D graphic artists using Computer Graphic Imaging (generally referred to as “CGI”) can remove things from scenes, too, like taking out palm trees from a scene that’s supposed to be happening in middle America.

Geology and Science

Geologists and scientists use 3D modelling to create models that simulate earthquakes and landforms, such as ocean trenches, that let them see the effects of stresses. Additionally, they can simulate motion, like flight patterns, including various factors that affect them.


3d_production_timelines-550x250.jpg

3D Production Pipelines 
In 3D production a film goes through 4 stages of development which involves creating the storyline, pre-production which involves addressing challenges they may face, then production of the film then the last stage post-production which involves polishing the end product and taking out any final falls in the movie.

The Storyline 
The storyline is created then they discuss with the Pixar team their ideas for the movie. The real challenge behind this stage is to get the audience involved and make them see the potential that their movie idea has.

Text Treatment Stage
Then the next stage the text treatment stage is written which is a short document which summarizes the main idea of the story. Then many ideas which are the same will be developed in order this way they can find the ideas to be solid or just ideas with open possibilities.

Storyboards and drawing 
The storyboards for the movie are then made storyboards are like the blueprint for the movie which shows the dialogue and action which will be in the movie. Each storyboard artist at Pixar receives script pages or a beat outline of the story, basically a map of the characters and their emotional changes that need to be seen through actions. Using these guidelines the artists assign the sequences to draw them out and then pitch their work to the director.

Voice Talent begins recording
The first stage of the voice recording, the artists choose to do the various voices in the film are recorded and then are eventually are put into the animation, they will record the same script several times over and the best take which suits the character will be used in the animation.

Edit toil begins making reels 
A reel is a videotape which allows the cleaned up storyboard sequence to stand alone, alone without a pitch person to tell the story. A pitch can be successful because of the storyteller in strong. So reels are an essential stage because they show the understanding of the timing in the sequence. The editorial then uses the information to fix the length and other elements of each shot in a sequence.

The Art Department creates the look and feel 
Storyboards and their own creative brainstorming and development work, the art department creates inspirational art illustrating the world and the characters it also designs sets, props, visual looks for surfaces and colours and “ colour scripts” for lighting, which are impressionistic Patel illustrations that emphasize the light in scenes.

Models are sculpted and articulated 
Using the art department’s model packet a set of informational drawings- the characters sets and props are either sculpted by hand and then scanned in three-dimensionally or modelled in 3D directly in the computer. They are then given a skeleton which the animator will use to make the object or character move. Woody has 100 points in his face alone.

Fuse Modelling

Screen Shot 2017-11-29 at 10.20.28

I started by selecting a male body as I wanted to make a normal looking male character that looked  at real and close to me as possible. Then I did the same for the legs, arms and finally head.

Screen Shot 2017-11-29 at 10.20.38

I then wanted to create/edit the body type that I have so had to use the bar in Adobe Fuse to thin or fatten parts of the body.

Screen Shot 2017-11-29 at 10.20.52

Then I had to give my character clothes cause I could have him be naked. So I found this Leather jacket that I liked, however, it was the wrong colour and I would have prefered a black one and at the time.

Screen Shot 2017-11-29 at 10.21.25

This was me changing the colour from Grey to Black and I added just a pair of trousers and a face mask which I sometimes wear.


Screen Shot 2017-11-29 at 10.42.58.png

And This was the final design I created and will be using him in my animation

model.jpg

Day & Night (2010 film)


Day & Night is a Pixar animated short film, directed by Teddy Newton and produced by Kevin Reher. It was packaged to be shown in theatres before Toy Story 3 and has been released to purchase on iTunes in the United States. Unlike most other Pixar shorts, the animation style combines 2D and 3D elements, and Up production designer, Don Shank says it is “unlike anything Pixar has produced before”.

What is the story:

Day & Night follows two characters, Day and Night. Inside Day is a day scene with a sun in the centre, and inside Night is a night scene with a moon in the centre. Whatever goes on inside of Day or Night expresses normal events that typically occur within a day or night, respectively, and these events often correspond with actions or emotions or actions that Day or Night express. For example, when Day is happy he will have a rainbow inside him, and when Night is happy he will have fireworks inside him.

Day and Night meet and at first are uneasy about each other. They are dismissive of each other because each perceives the other as being different, and their prejudices result in a physical altercation between the two. However, as the characters discover the many fascinating events that occur in each other, they learn to appreciate them and learn to like one another. At the end of the film, the Sun descends in Day and rises in Night, so that when the Sun is at the same height above the horizon in each, both characters appear to be identical. As the Sun continues its course, Day becomes Night, and Night becomes Day.

How was it made?

The Day and Night creative team has never done anything like this short film before. They have discussed the idea and agreed on the development stages. The story has a weird concept. Amalgamating 2D and 3D animation techniques have conveyed it. They have decided to have two opposite characters that will meet and they should be drawn on 2D and within them, the viewer could see the 3D environment, which will tell the story and will reflect on the character’s emotions. The concept artist drew the characters and scenes and pitched the idea in a storyboard. Then they discussed the storyboards with the rest of the team and reflected on the feedback by doing some changes. The team of animators worked closely together to make the characters move and synchronize the background and the scenes. Other members of the team worked on the transition between the scenes and some additional effects. After that, the sound engineers added appropriate sound to compliment the animation and the graphic designers created the title and choose a suitable typeface for the credits.

The short uses a novel effect of combining 2D and 3D animation. The outlines of both characters are hand drawn and animated in 2-D, while the scenes inside their silhouettes are rendered in 3D. The use of a masking technique allows the 2D characters to be windows into a 3D world inside them. The Day & Night is Pixar’s second short film to be partially animated in 2D, after Your Friend the Rat.

Produced by :

  • John Lasseter – Executive Producer
  • Kevin Reher- Producer
  • Marc Sondheimer – Executive Producer

Music by:

  • Michael Giacchino

Film Editing by:

  • Greg Snyder

Production Design by:

  • Don Shank


Maya Tutorials (Ships/Moving Parts)


During our lessons about Maya, were given the task of creating a spaceship and a Greek building (Seen Above) The spaceships we created first as a test to flex our basic Maya skills. To create the ship I started with a square and extruded the sides to create the wings. Then extrude the front to create the cone. To make it more cylindrical I used the rounding tool to create a semi-realistic looking spaceship, however, I wouldn’t fly it.

Screen Shot 2017-10-04 at 09.19.57.pngThe Greek building was much harder as it took a lot more skill to extrude another box for a bigger box to create a type of staircase effect. Then I used a cylinder tool to create the pillars. After this, I duplicated the bottom half and put it on top to create a greek style building.

Screen Shot 2017-10-04 at 09.21.38.png

During Today’s lesson, we were given the chance to create a simple animation where 3 different shapes moved across the screen. This required us to learn how to set up key points which were simple as it only required a few actions. Key Frames allowed us to create the starting point and the end point and Maya would figure out and animate the things in between.

Screen Shot 2017-10-04 at 10.52.57.png

During today’s lesson, we learned how to animate objects that use keyframes Keyframes were simple to do and I was able to animate the 3 shapes.

Screen Shot 2017-10-04 at 10.53.10.png

We then had to animate a bouncing ball which I found to be pretty easy as some

The robot was given to us because we had to light it using Maya new lighting system (Arnold). This allowed up to add 3 area lights. One was placed either side of the robot facing it and one placed above him.Screen Shot 2017-11-08 at 09.25.11.png

The first time we were introduced to HumanIk I found using the actual software was quite challenging.